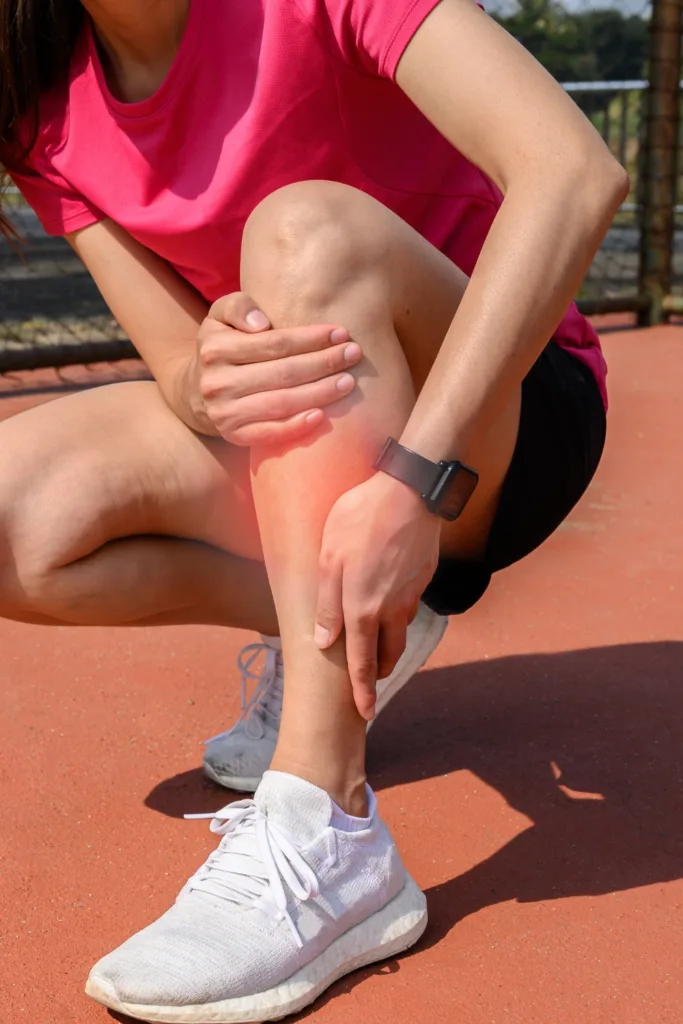
If you’ve ever felt a sharp pain in your shins when running, you may have a case of shin splints.
This painful condition is a common issue for beginner and experienced runners alike.
In fact, shin splints is one of the most common overuse injuries in the running community, affecting almost 35% of the athletic population.
In addition, according to research, exercise-induced shin discomfort is responsible for 10-20% of all running injuries and 60% of all lower-limb overuse injuries.
The good news is there are ways to treat and prevent shin splints so you can continue running pain-free.
In this guide we’ll look at:
- What are shin splints?
- What causes shin splints?
- How to treat shin splints
- How to prevent shin splints
- 9 of the best shin splint stretches for runners
Ready?
Let’s go!

What are shin splints?
Shin splints (also known as medial tibial stress syndrome – MTSS) refers to the pain along the shin bone (tibia) – the large bone in the front of your lower leg.
A common misconception is that shin splints are only caused by running.
Running is not the only cause of shin splints. In fact, any activity that involves repetitive stress on the shinbone can cause shin splints.
This means activities like walking, hiking, basketball and dancing can cause shin splints.
The pain caused by shin splints typically begins soon after exercise.
Whilst the pain may be dull and achy to begin with, it can soon become sharp and severe, eventually stopping you from exercising.
Here are the key signs and symptoms to look out for:
- Pain in the shin bone
- Soreness and tenderness along the inner side of your shin bone
- Mild swelling in your lower leg
So it’s important you listen to your body and don’t push through the pain.
Related: Overtraining syndrome: 11 signs of overtraining when running
What causes shin splints?
The main cause of shin splints is repetitive stress on the shin bone and the connective tissue surrounding it.
As we explained earlier, anyone who regularly does activities like running and activities that involve jumping are susceptible to shin splints.
Other common causes of shin splints are:
- Flat feet
- High arches
- Obesity
- Uneven leg length
- Running with a heel foot strike (this is when your heel hits the ground first)
- Running wearing worn out or poorly fitting running shoes
- Running on hard or uneven surfaces
- Progressing too soon or taking sudden leaps in your training
- Overtraining
Related: IT band syndrome: How to fix it + 7 training mistakes to avoid

How to treat shin splints
#1 Rest
Some people think that it’s okay to push through the pain when this couldn’t be further from the truth.
It’s important you rest as soon as you start to feel pain in your shin bone.
Rest is one of the most important things you can do to help your body heal from shin splints.
#2 Ice
Applying ice to the affected area will help with swelling and inflammation.
Hold an ice pack against your shins for around 10 minutes – a bag of frozen peas wrapped in a tea towel works well.
Do this every few hours for the first few days.
#3 Massage
Foam rolling is an easy and effective way to self-massage shin splints.
However, a word of caution. Foam rolling can be painful due to the levels of force and firmness of a foam roller.
So if you have a low pain threshold, this treatment method may not be for you.
#4 Use over the counter medication
Over the counter pain medication like paracetamol and ibuprofen work to relieve pain and inflammation.
#5 Speak to a doctor
If you regularly struggle with shin splint pain, then a diagnosis from a medical professional may help towards the path to recovery.
Your doctor will be able to advise on a suitable treatment plan and will help put measures in place to prevent future flare ups.
They may refer you to a physical therapist if you repeatedly experience shin splint pain.
Re-injury increases the risk of repetitive shin splints, so make sure you follow your doctor’s advice and put in place preventative measures.
Related: Hip pain after running: 8 causes + how to fix it

How to prevent shin splints
The good news is that shin splints can be prevented.
It’s important you treat shin splints as soon as you start to feel pain in your shins.
Ignoring the pain may worsen your condition and could lead to further injury.
Here are ways to prevent shin splints:
#1 Gradually increase the intensity and duration of your workouts
Gradually increase the intensity and duration of your workouts.
This is especially important if you’re training for a long distance event.
The general rule of thumb is to progress by 5 to 10% each week. So if you run 6 miles one week, the next week add no more than 10% in terms of mileage.
Ensure you avoid sudden leaps in training and spread out days between activities.
You may also want to include other forms of exercise other than running in your training plan, such as cross training and strength training, as we explain later in this guide.
#2 Wear proper fitting running shoes
Wearing properly fitting running shoes that provide the necessary comfort and support is key to prevent shin splints from reoccurring.
The cushioning on your current running shoes may have compressed over time so they no longer absorb the impact when you run.
Depending on your running gait and foot strike pattern, your running shoes will need to be tailored to how you run.
Visit your local running shoe store for tips and advice on finding the right running shoes.
Shock-absorbent insoles and other shoe adjustments can help to avoid shin splints, so speak with a professional and get their advice.
The bottom line? Your running shoes should be providing the right level of support.
#3 Warm up
A proper warm up has lots of benefits, namely that it helps to mobilise your muscles and joints.
A warm up is also a great way to get you mentally prepared for the run ahead.
Cold weather has been shown to aggravate shin splints, so it’s much more necessary to warm up before a run with this condition.
A warm up should raise your heart rate but not leave you fatigued before a run.
Aim to include some light jogging followed by some dynamic stretches that work your calf muscles and lower legs.
#5 Strength train
Strength training is one of the best ways to reduce the risk of injury.
By incorporating a few strength training sessions in your weekly routine, you will go a long way to make your muscles and joints stronger.
Aim to include bodyweight exercises and free weight exercises in your sessions.
#6 Cross train
Cross training is recommended for any runner.
Activities like walking, hiking, cycling, swimming, yoga and Pilates are all great forms of cross training.
Cross training is so beneficial for runners because it reduces the risk of injury and allows injured runners to maintain their levels of fitness.
It also helps to improve your strength and endurance and adds much needed variety into your training plan.
#7 Stretch
Stretching can be one of the most effective ways to prevent shin splints.
But here’s where it can get tricky: stretching incorrectly can actually make shin splints worse.
So, make sure you’re doing the right stretches and doing them correctly.
In the next section of this guide you will find 9 of the best shin splint stretches.
#8 Switch to low impact exercise
If you do not want to completely stop all forms of exercise, then switch to low impact activities like walking, cycling and swimming.
It’s important you only continue exercising as long as you don’t experience any pain.
The key is to avoid continued repetitive exercise of your lower leg when you experience pain.
Related: Proper running foot strike and 3 actionable ways to improve it

9 of the best shin splint stretches for runners
Now you know more about shin splints and what causes this painful condition, here are some shin splint stretches for runners.
#1 Toe taps
- Stand up straight and evenly distribute your weight between your two feet.
- Keep your heel on the floor and tap your toes on your right foot for 30 seconds, before switching to your left foot.
- Try to get as many taps in as possible during the 30 seconds, and be sure not to lean forward or backward.
- Make your lower leg muscles do all of the work to tap your foot—you should feel the fatigue throughout your shin!
#2 Ankle alphabet
- Sit on a chair so that your feet do not touch the floor.
- Use your big toe to write each letter of the alphabet.
- Use only your foot and ankle, and keep your movements small.
- Do two sets – one set per foot.
#3 Standing calf stretch
- Stand with your hands against a wall or the back of a chair for support.
- Put one foot behind you. Keep your feet flat and pointed straight ahead.
- Bend your front knee slightly. With your back heel down, bend your back knee. If it’s too hard to keep your heel down, shorten your stride.
- Hold the stretch for at least 30 seconds.
- Repeat the stretch 2 or 3 times, and aim for stretching 3 times a day.
#4 Standing heel raise
- Stand on the injured leg.
- Raise your other leg off the ground. Hold onto a railing or wall for balance.
- Slowly rise up on the toes of your injured leg.
- Hold for 1 second and then lower your heel.
- Repeat 10 times.
#5 Wall calf stretch
- Stand with your hands against a wall or on the back of a chair for support.
- Put one foot behind you. Keep your feet flat and pointed straight ahead.
- With your back heel down and back leg straight, bend the front knee until you feel a stretch in the calf of your back leg.
- Keep your back straight throughout the stretch.
- Hold the stretch for at least 30 seconds.
- Repeat the stretch 2 or 3 times, and aim for stretching 3 times a day.
#6 Chair squats
- Stand in front of a chair with your feet shoulder width apart.
- Slowly lower your buttocks until you barely feel the chair seat, and then stand up.
- Repeat 20 times.
#7 Toe curls
- Place a towel on the floor. Put your foot flat on the towel.
- Grab the towel with your toes by curling them around the towel.
- Lift the towel up with your toes.
#8 Seated calf stretch with band
- Sitting on the floor, bend one knee and put the other leg out in front of you, with your heel on the floor.
- Loop an exercise band, a towel, or a belt around the ball of your foot.
- Slowly pull your toe towards you and hold for 15 to 30 seconds.
- Repeat 2 to 4 times.
#9 Anterior tibialis strengthening
- Sit on the floor or a bench.
- Secure an exercise band around something sturdy and loop it around the top of your foot.
- With your toes facing up, flex your ankle toward you to the count of 2. Return your ankle down to the count of 4.
- Do 10 to 20 repetitions of 2 to 3 sets daily.
- 5 things I wish I’d known before returning to running - March 3, 2024
- Running 20 minutes a day: Benefits + how to start - January 27, 2024
- How to run your first 2 hour half marathon - January 16, 2024
